uiautomator配置

AI-摘要
Tianli GPT
AI初始化中...
介绍自己 🙈
生成本文简介 👋
推荐相关文章 📖
前往主页 🏠
前往爱发电购买
uiautomator配置
钱涛添加依赖
在build.gradle中添加uiautomator依赖
1 | androidTestImplementation 'androidx.test.uiautomator:uiautomator:2.2.0' |

编写用例
需要在androidTest中编写用例,而不是在main中。新建一个test类,下面是一个打开设置的一个测试。
1 | package com.tt.demo; |
测试类必须有@RunWith(AndroidJUnit4.class)运行器装饰,测试方法也必要有@Test装饰
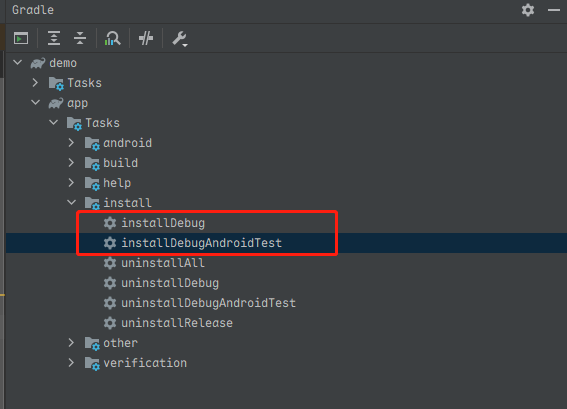
安装APK
需要安装2个apk,一个是由main中编译出来的apk(傀儡应用),另一个则是由androidTest编译出来的apk。可以直接通过右侧的Gradle中的install直接安装
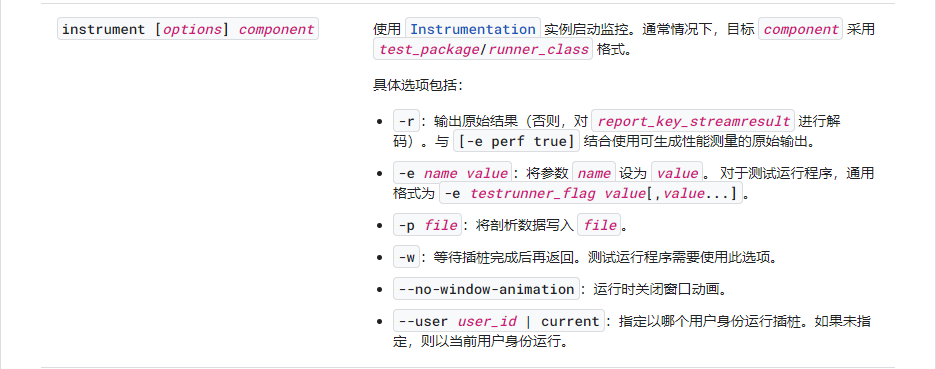
运行测试
打开命令提示符,输入以下指令即可开始进行测试
1 | adb shell am instrument -w -e class com.tt.demo.test#openSettings com.tt.demo.test/androidx.test.runner.AndroidJUnitRunner |


评论
匿名评论隐私政策

